> ## Documentation Index
> Fetch the complete documentation index at: https://moengage-docs-limits-data.mintlify.site/llms.txt
> Use this file to discover all available pages before exploring further.
# How to Collect NPS Ratings Using a Slider
# Introduction
Gathering customer feedback is essential for improving satisfaction and loyalty. One way to achieve this is by displaying an HTML in-app message to collect Net Promoter Score (NPS) ratings using a slider. The target audience for this pop-up will be users who have recently ordered a product, allowing you to gather valuable insights into their experiences and satisfaction levels.
In this article, we will create an In-app message designed to collect NPS ratings from product buyers. This will enable you to capture user feedback and better understand customer loyalty.
# Expected Result
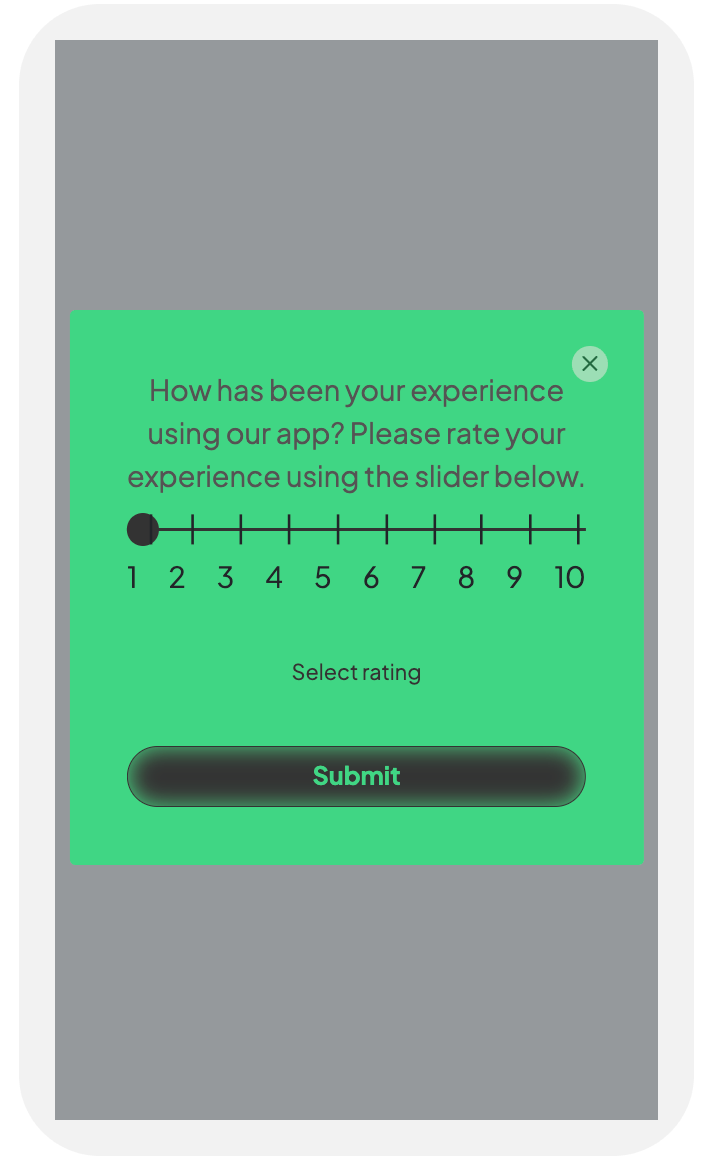
Users who have ordered a product will see an NPS rating pop-up with a slider. This will allow them to rate their experience, providing the company with insights into customer satisfaction and areas for improvement.
 Integration of the MoEngage Android SDK or iOS SDK with your app. For more information, refer to the [Developer Guide](/developer-guide/introduction).
# Create an In-App Campaign
In this section, let us create an in-app message designed to collect NPS ratings from product buyers.
## Step 1: Target users
1. Navigate to the sidebar on the left and click **Engage** > **Campaigns** and click **+ Create campaign**, or click **+ Create new**> **Campaign**.
2. Under **Inbound**, click **In-app**.
Integration of the MoEngage Android SDK or iOS SDK with your app. For more information, refer to the [Developer Guide](/developer-guide/introduction).
# Create an In-App Campaign
In this section, let us create an in-app message designed to collect NPS ratings from product buyers.
## Step 1: Target users
1. Navigate to the sidebar on the left and click **Engage** > **Campaigns** and click **+ Create campaign**, or click **+ Create new**> **Campaign**.
2. Under **Inbound**, click **In-app**.
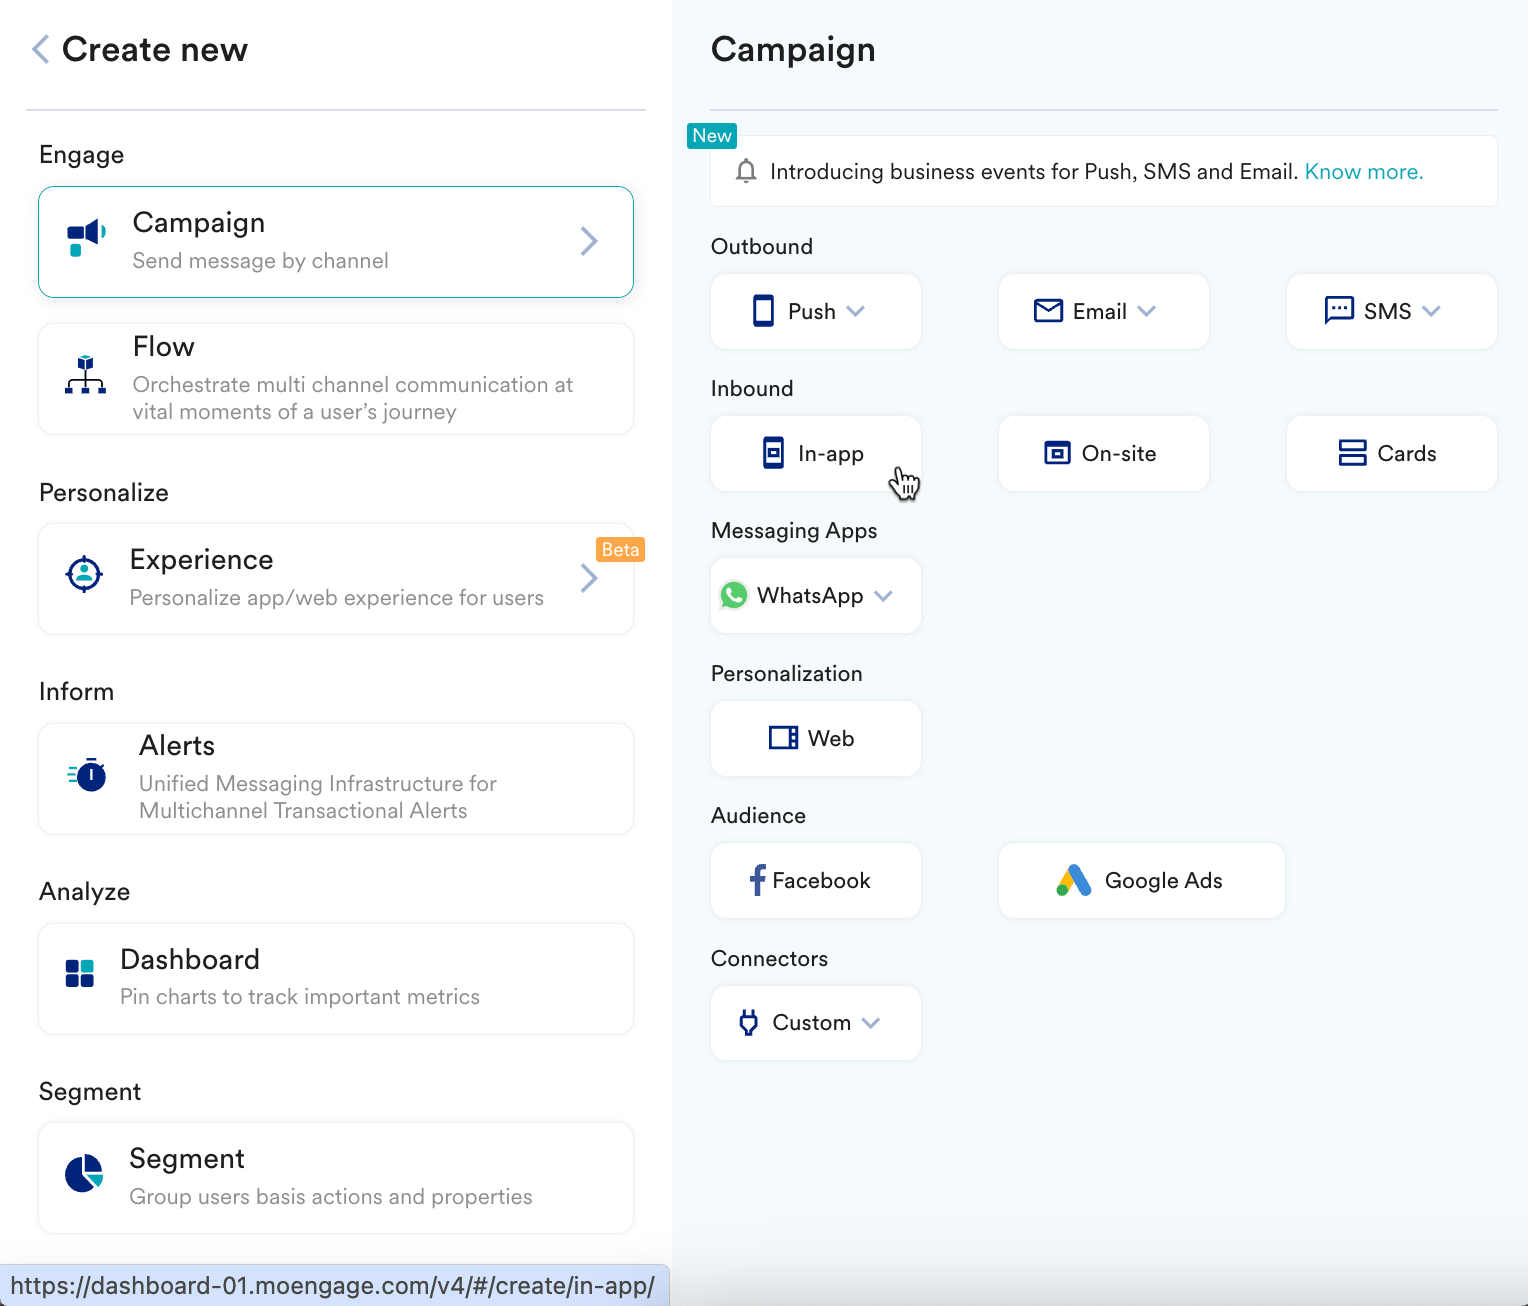 You are taken to the first step "Target users" of defining your campaign.
3. Enter the following details:
* **Campaign name**: Enter a name for the campaign. For example, "NPS rating campaign."
* **Campaign tags**: Select the relevant campaign tags.
4. In the **Target Platforms** section, select **iOS**.
5. In the **Trigger Criteria** section, select **On custom event**and set the trigger to display the NPS rating pop-up after a user completes an order.
You are taken to the first step "Target users" of defining your campaign.
3. Enter the following details:
* **Campaign name**: Enter a name for the campaign. For example, "NPS rating campaign."
* **Campaign tags**: Select the relevant campaign tags.
4. In the **Target Platforms** section, select **iOS**.
5. In the **Trigger Criteria** section, select **On custom event**and set the trigger to display the NPS rating pop-up after a user completes an order.
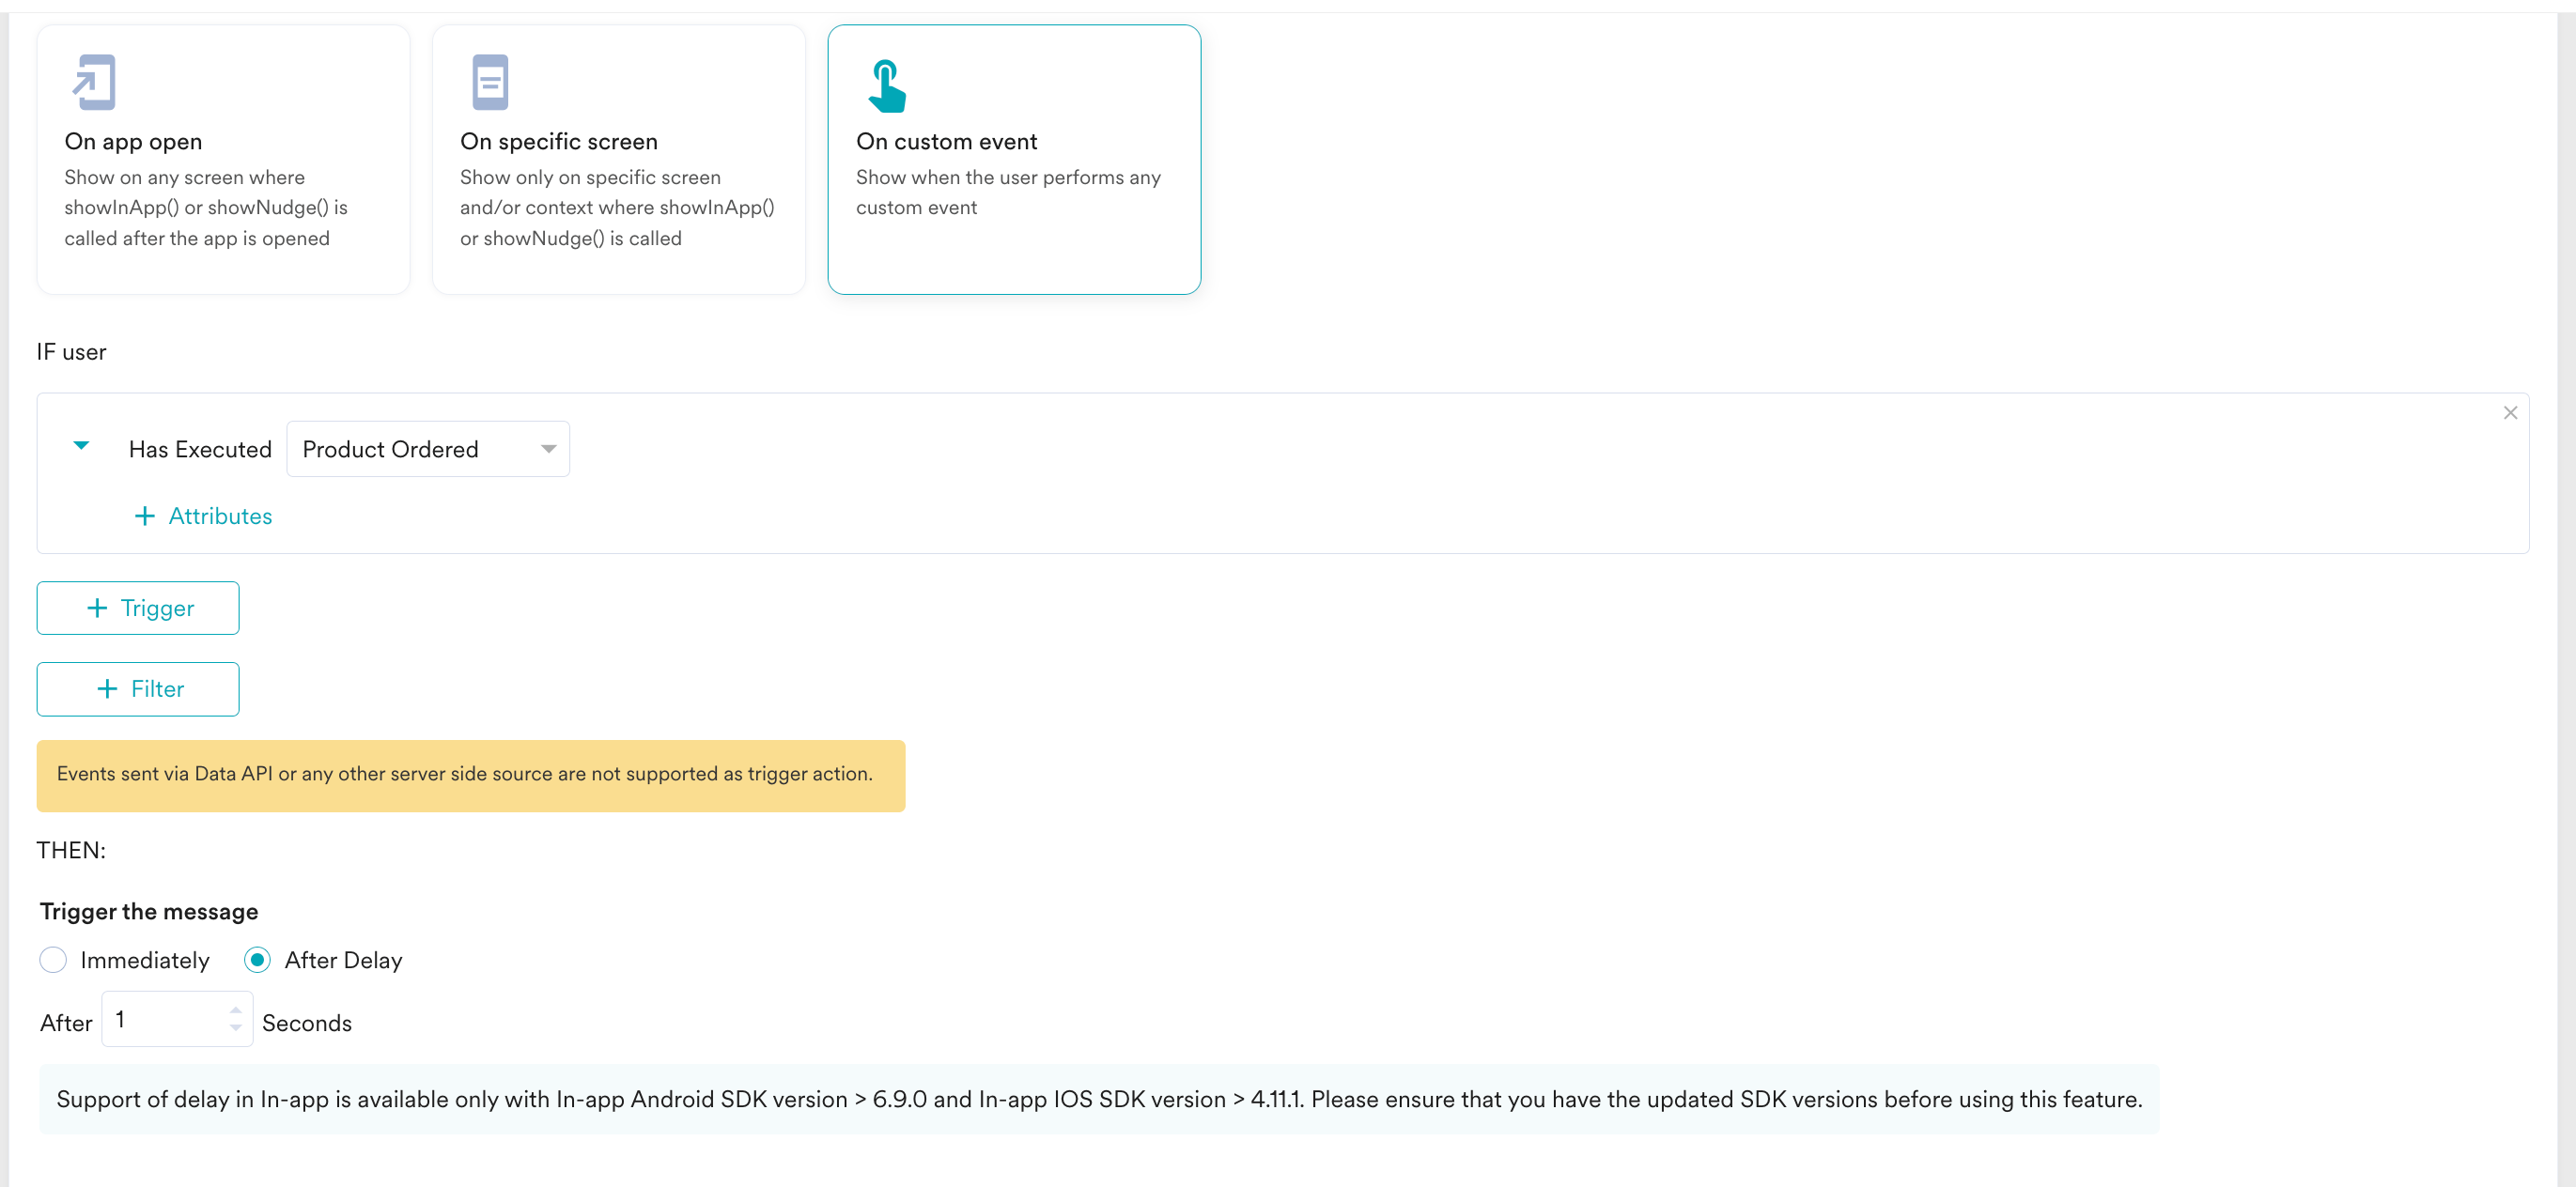 This option helps you nudge the user when they are highly engaged with your app. For example, it shows the pop-up when a user has done "Order completed."
6. In the **Select trigger time** section, select **Immediately** to send the message.
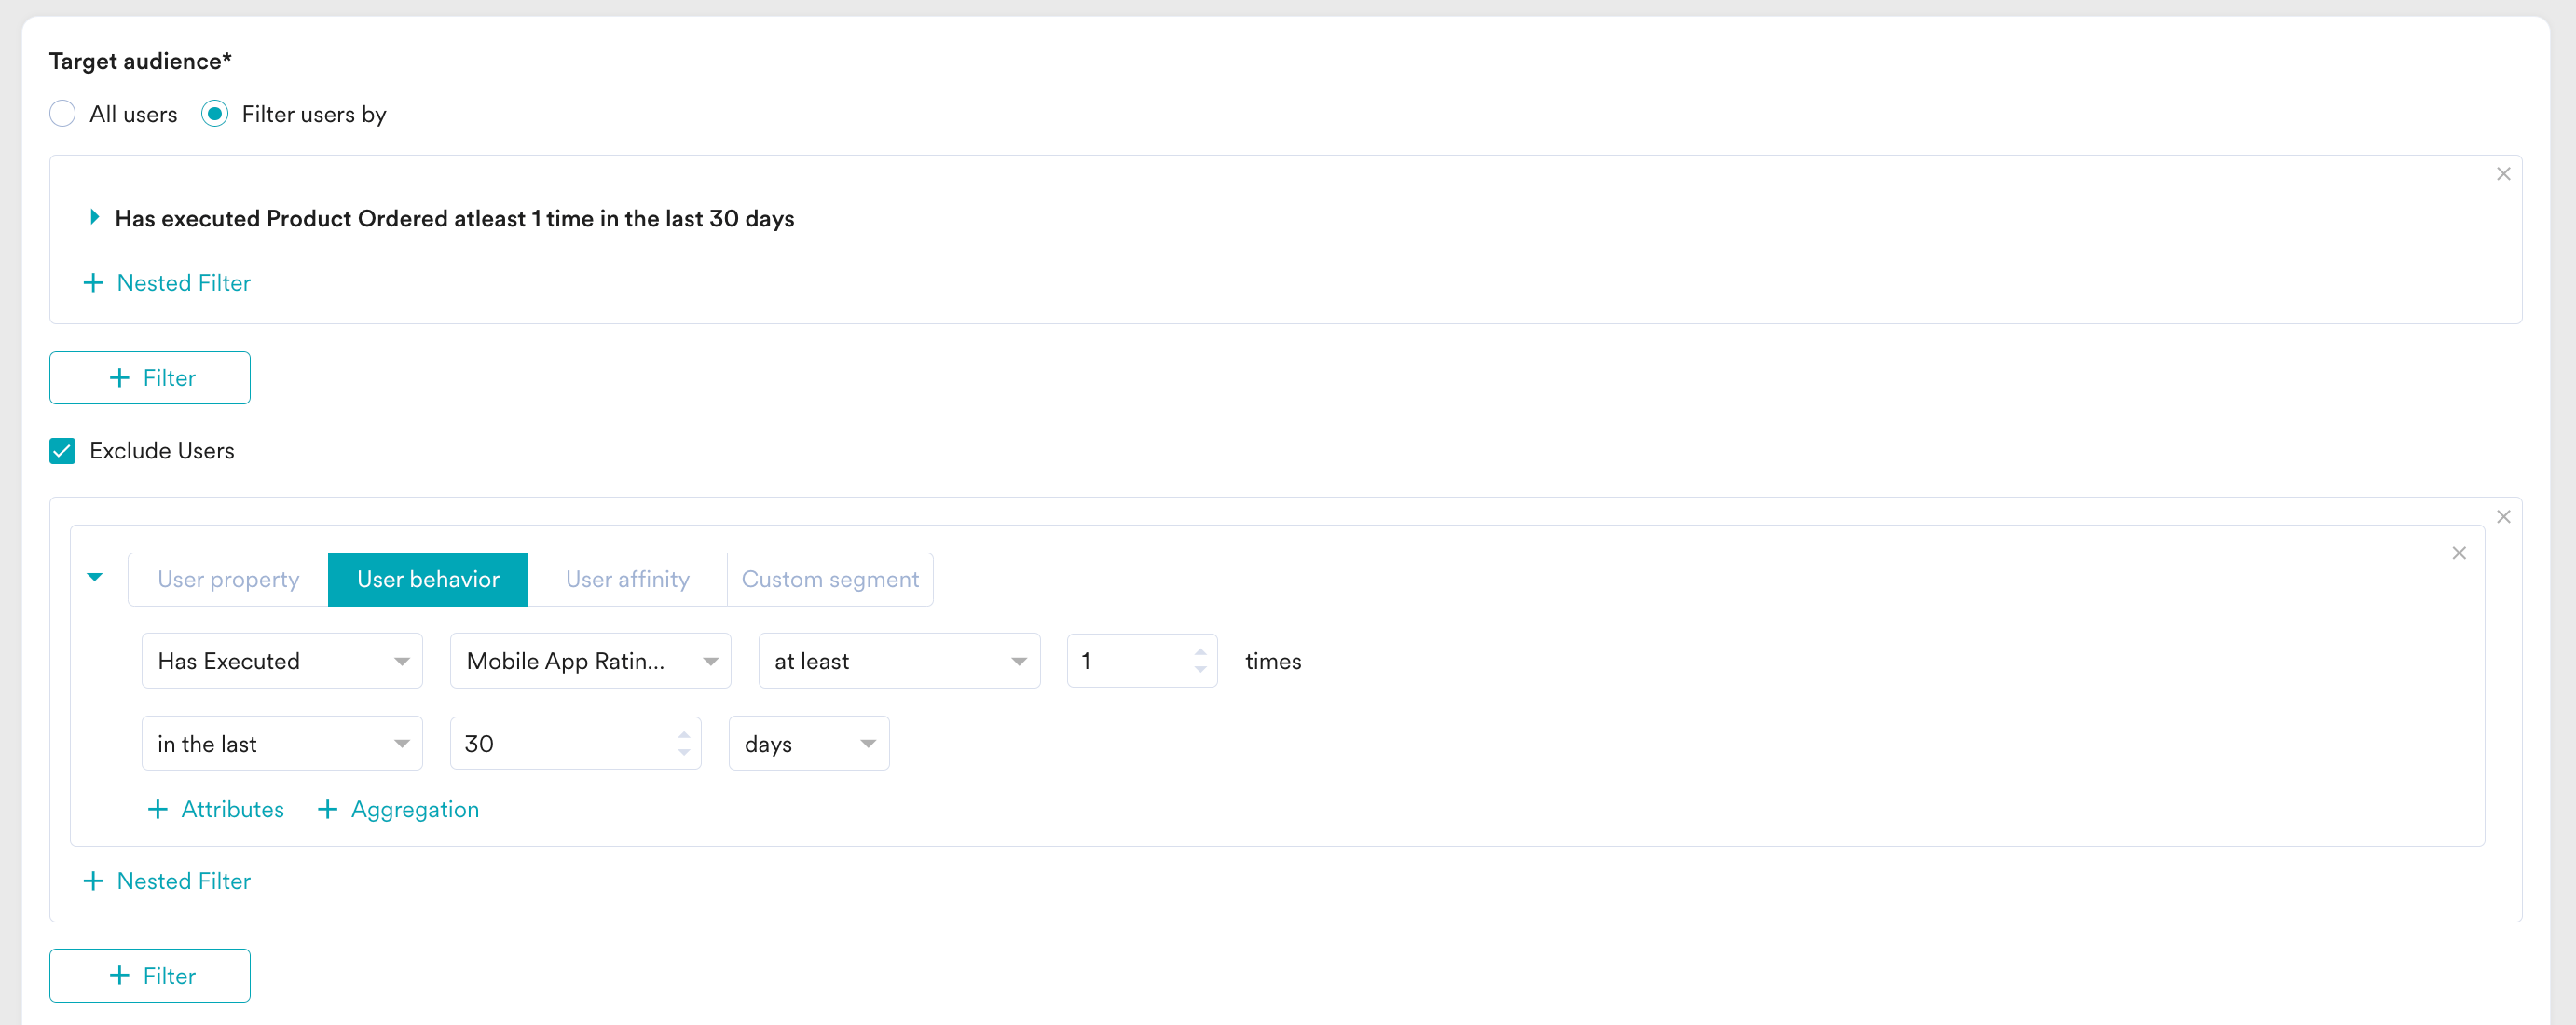
7. In the **Target audience** section, select **Filter users by** to specifically target only those users users who have ordered a product within the last 30 days and exclude users who have already provided an NPS rating.
This option helps you nudge the user when they are highly engaged with your app. For example, it shows the pop-up when a user has done "Order completed."
6. In the **Select trigger time** section, select **Immediately** to send the message.
7. In the **Target audience** section, select **Filter users by** to specifically target only those users users who have ordered a product within the last 30 days and exclude users who have already provided an NPS rating.
 8. Click **Next** to move to the second step, "Content," where you can define the content that will go into your campaign.
## Step 2: Content
MoEngage In-App campaign offers a variety of templates for all your use cases. It also provides the option to start from scratch.
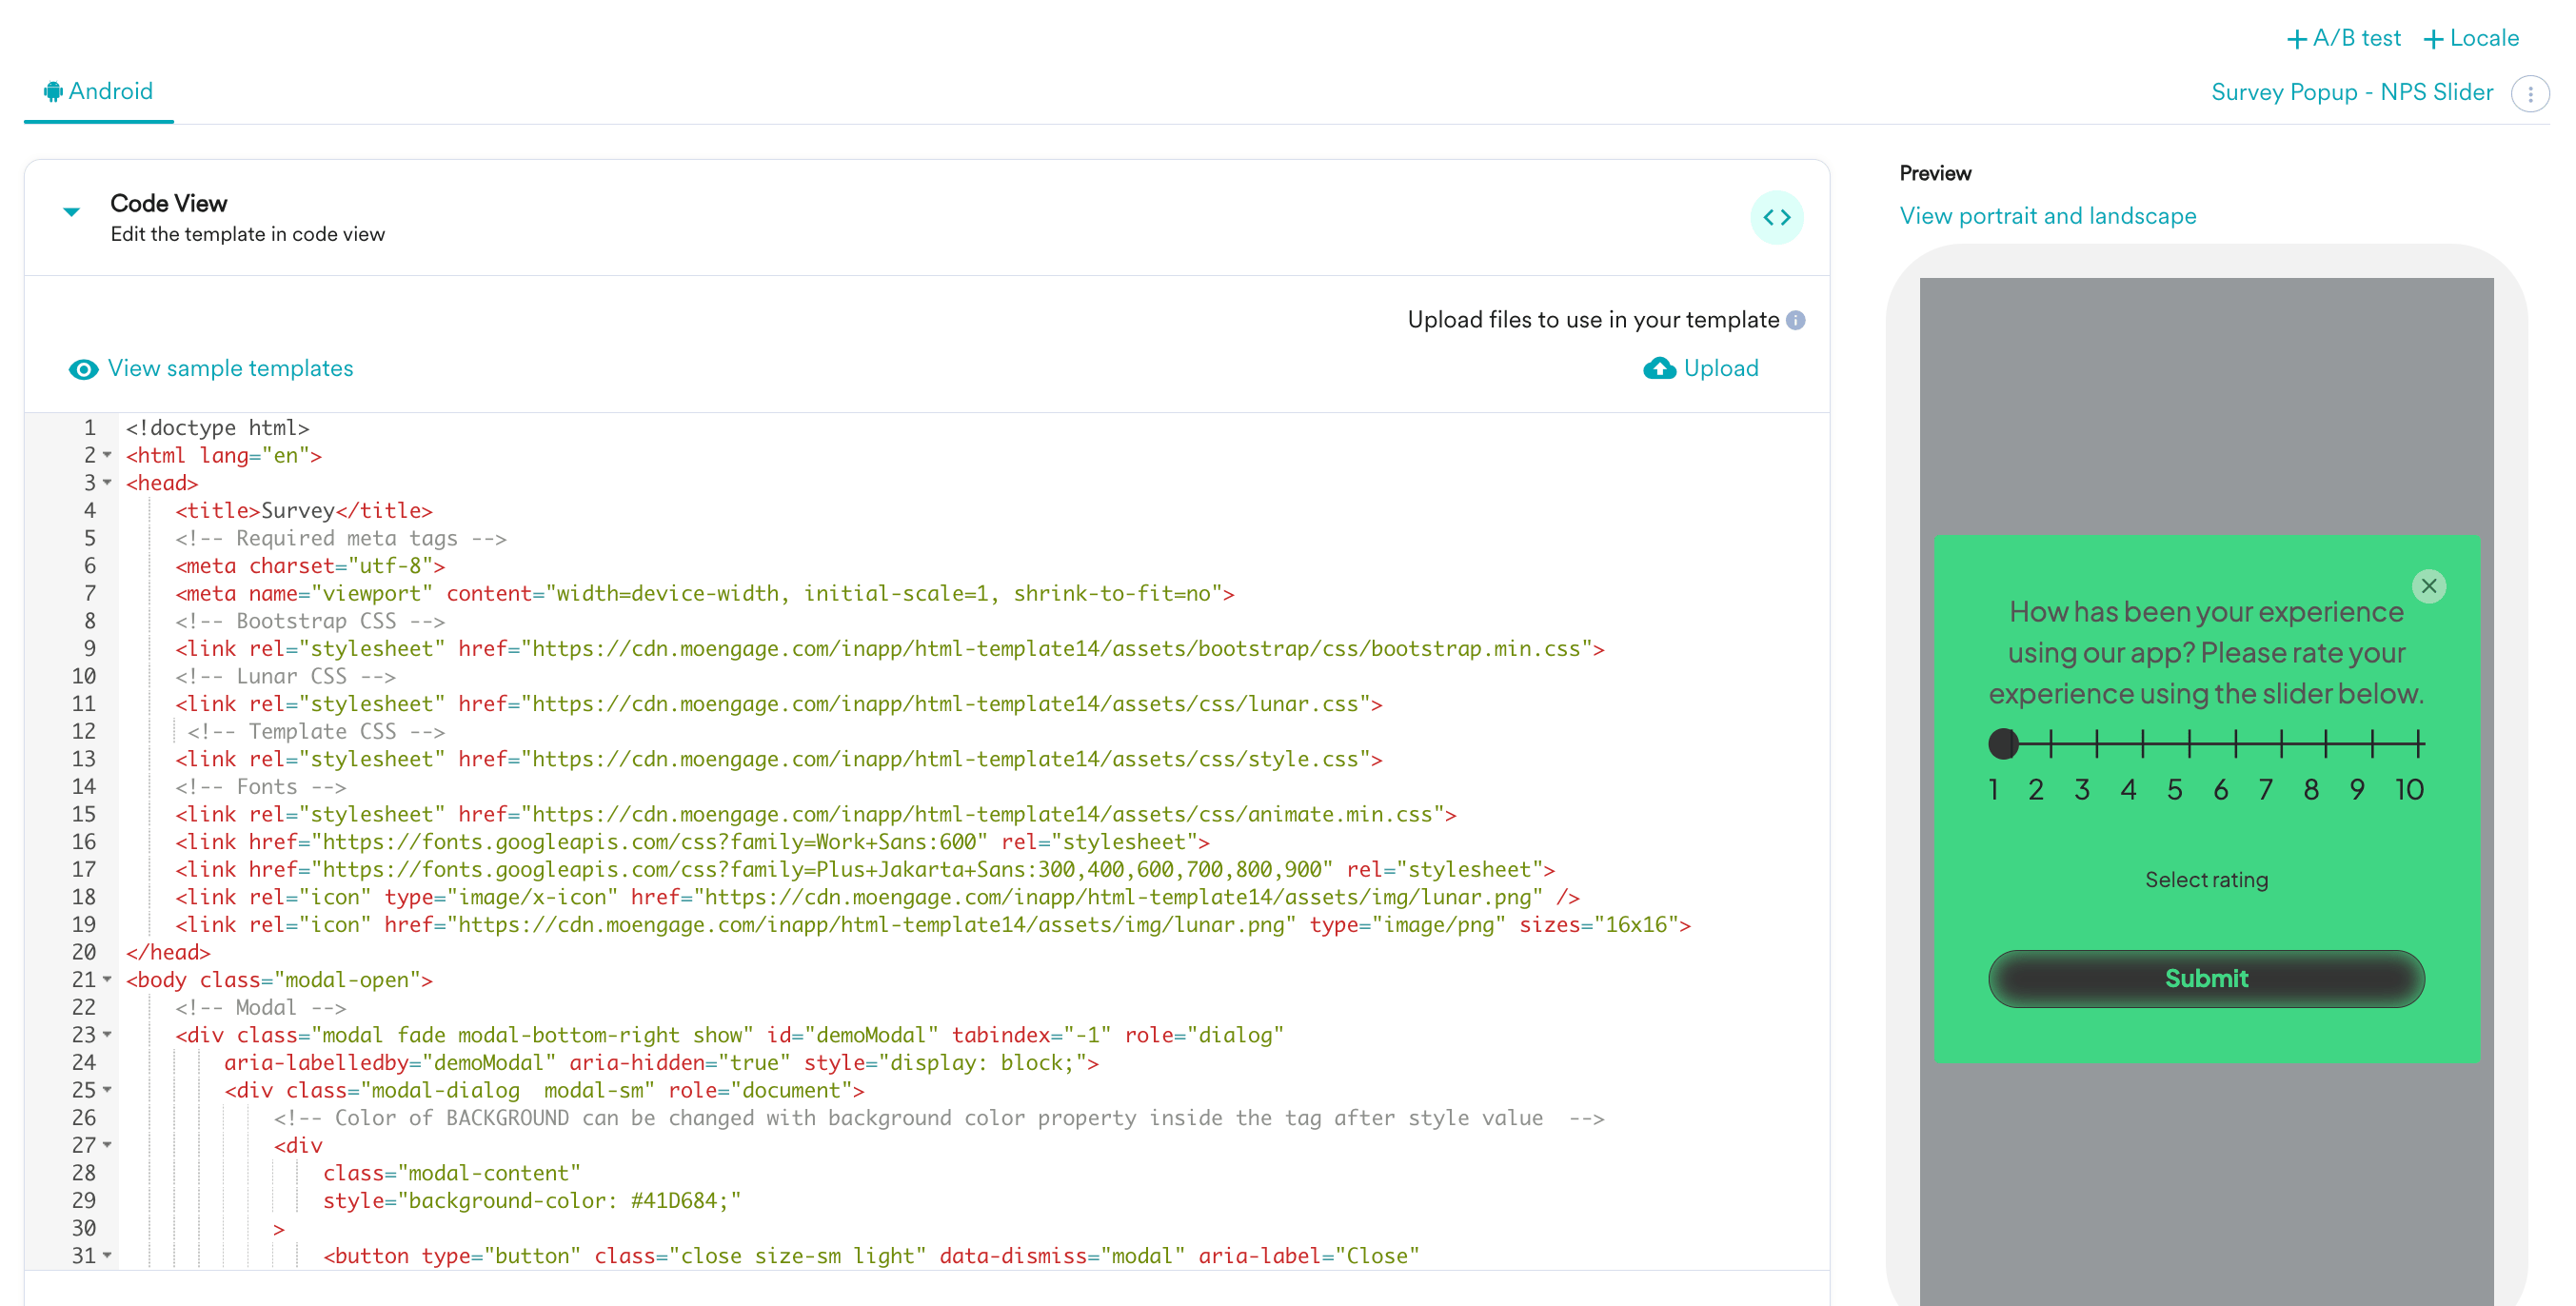
1. Select the template you want to show the user. You can select any HTML in-app message template for designing the pop-up and customize it on the **Template Settings** page.
2. Edit the NPS Rating pop-up:
* Select and open the NPS rating template.
* The code of the template will open up in the code editor.
* You can change the template according to your use case. For example, you can change the look and feel of the slider or add a highlighted option in a different color.
8. Click **Next** to move to the second step, "Content," where you can define the content that will go into your campaign.
## Step 2: Content
MoEngage In-App campaign offers a variety of templates for all your use cases. It also provides the option to start from scratch.
1. Select the template you want to show the user. You can select any HTML in-app message template for designing the pop-up and customize it on the **Template Settings** page.
2. Edit the NPS Rating pop-up:
* Select and open the NPS rating template.
* The code of the template will open up in the code editor.
* You can change the template according to your use case. For example, you can change the look and feel of the slider or add a highlighted option in a different color.
 3. Click **Next** to move to the third step, "Schedule and goals," where you can define your campaign's schedule and goals.
## Step 3: Schedule and goals
Here, you can select the campaign schedule, add the conversion goal, choose the campaign's priority, and define custom delivery controls.
1. In the **Send campaign** section, define when you want to start and end your In-app campaign with the frequency and limits.
3. Click **Next** to move to the third step, "Schedule and goals," where you can define your campaign's schedule and goals.
## Step 3: Schedule and goals
Here, you can select the campaign schedule, add the conversion goal, choose the campaign's priority, and define custom delivery controls.
1. In the **Send campaign** section, define when you want to start and end your In-app campaign with the frequency and limits. 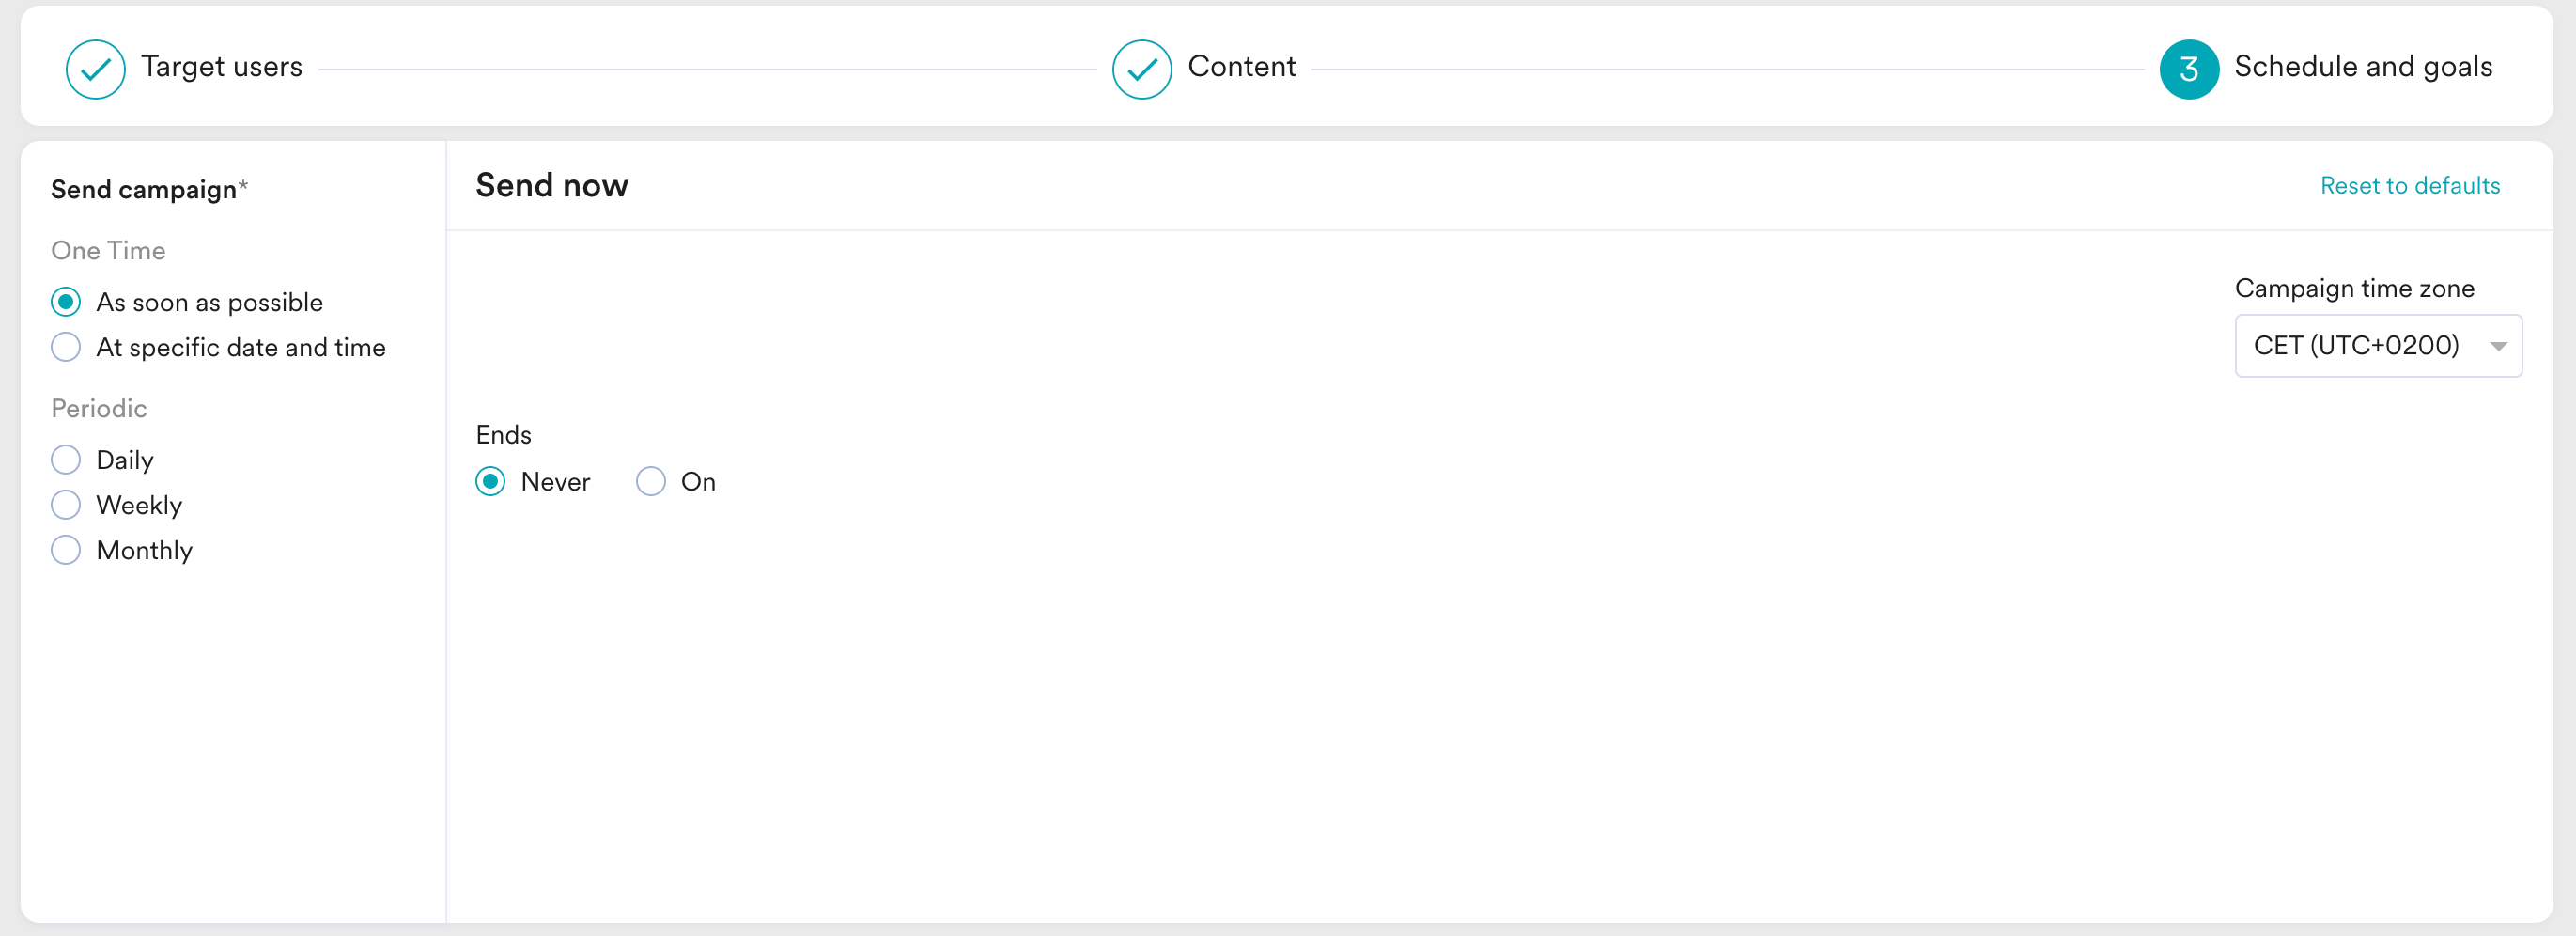 2. In the **Conversion Goals** section, add conversion goals that you would like to track.
3. In the **Campaign priority** section, assign a priority to this campaign. Assigning a priority helps you decide which In-App message to show to a user when they are eligible for more than one message at a specific time. For example, selecting **Critical** ensures that the users will always see this even when there are other campaigns for which they are eligible.
4. In the **Delivery Controls** section, define the controls based on your requirements. For more information, refer to [Create In-App Campaign](/user-guide/campaigns-and-channels/in-app-message/create/create-in-app-campaign).
2. In the **Conversion Goals** section, add conversion goals that you would like to track.
3. In the **Campaign priority** section, assign a priority to this campaign. Assigning a priority helps you decide which In-App message to show to a user when they are eligible for more than one message at a specific time. For example, selecting **Critical** ensures that the users will always see this even when there are other campaigns for which they are eligible.
4. In the **Delivery Controls** section, define the controls based on your requirements. For more information, refer to [Create In-App Campaign](/user-guide/campaigns-and-channels/in-app-message/create/create-in-app-campaign). 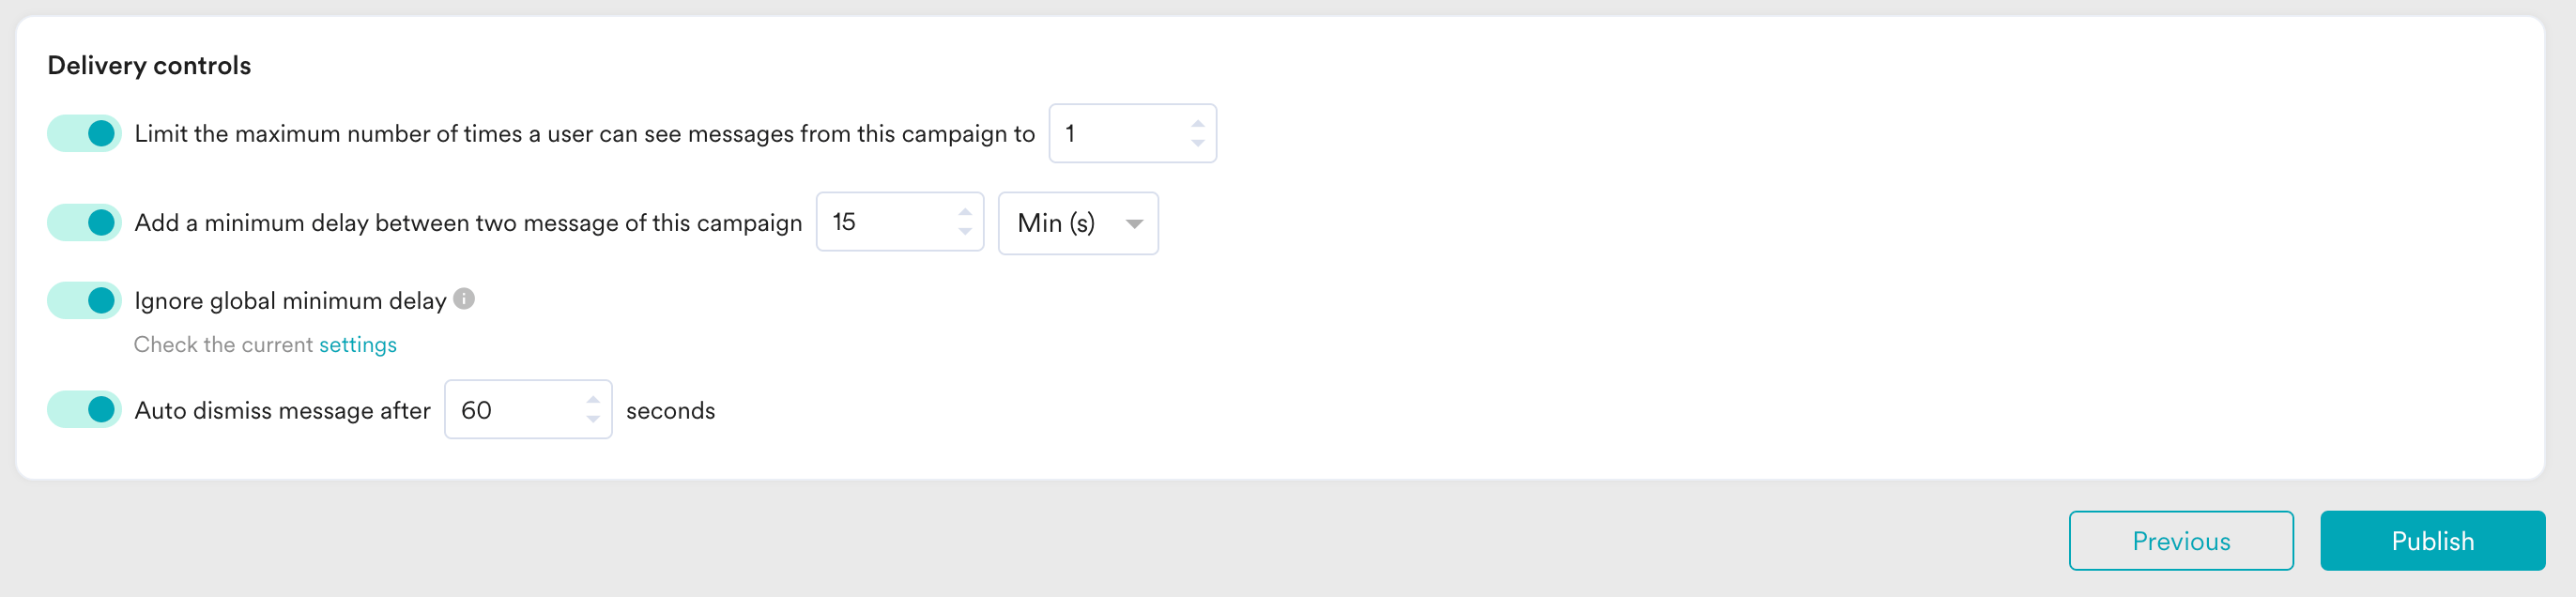 5. Click **Publish**.
# Data Collection and Analysis
1. To view the collected survey responses and users who submitted them, go to **Segment** > **Create segment**.
2. Filter based on the “response submitted” event as shown below:
5. Click **Publish**.
# Data Collection and Analysis
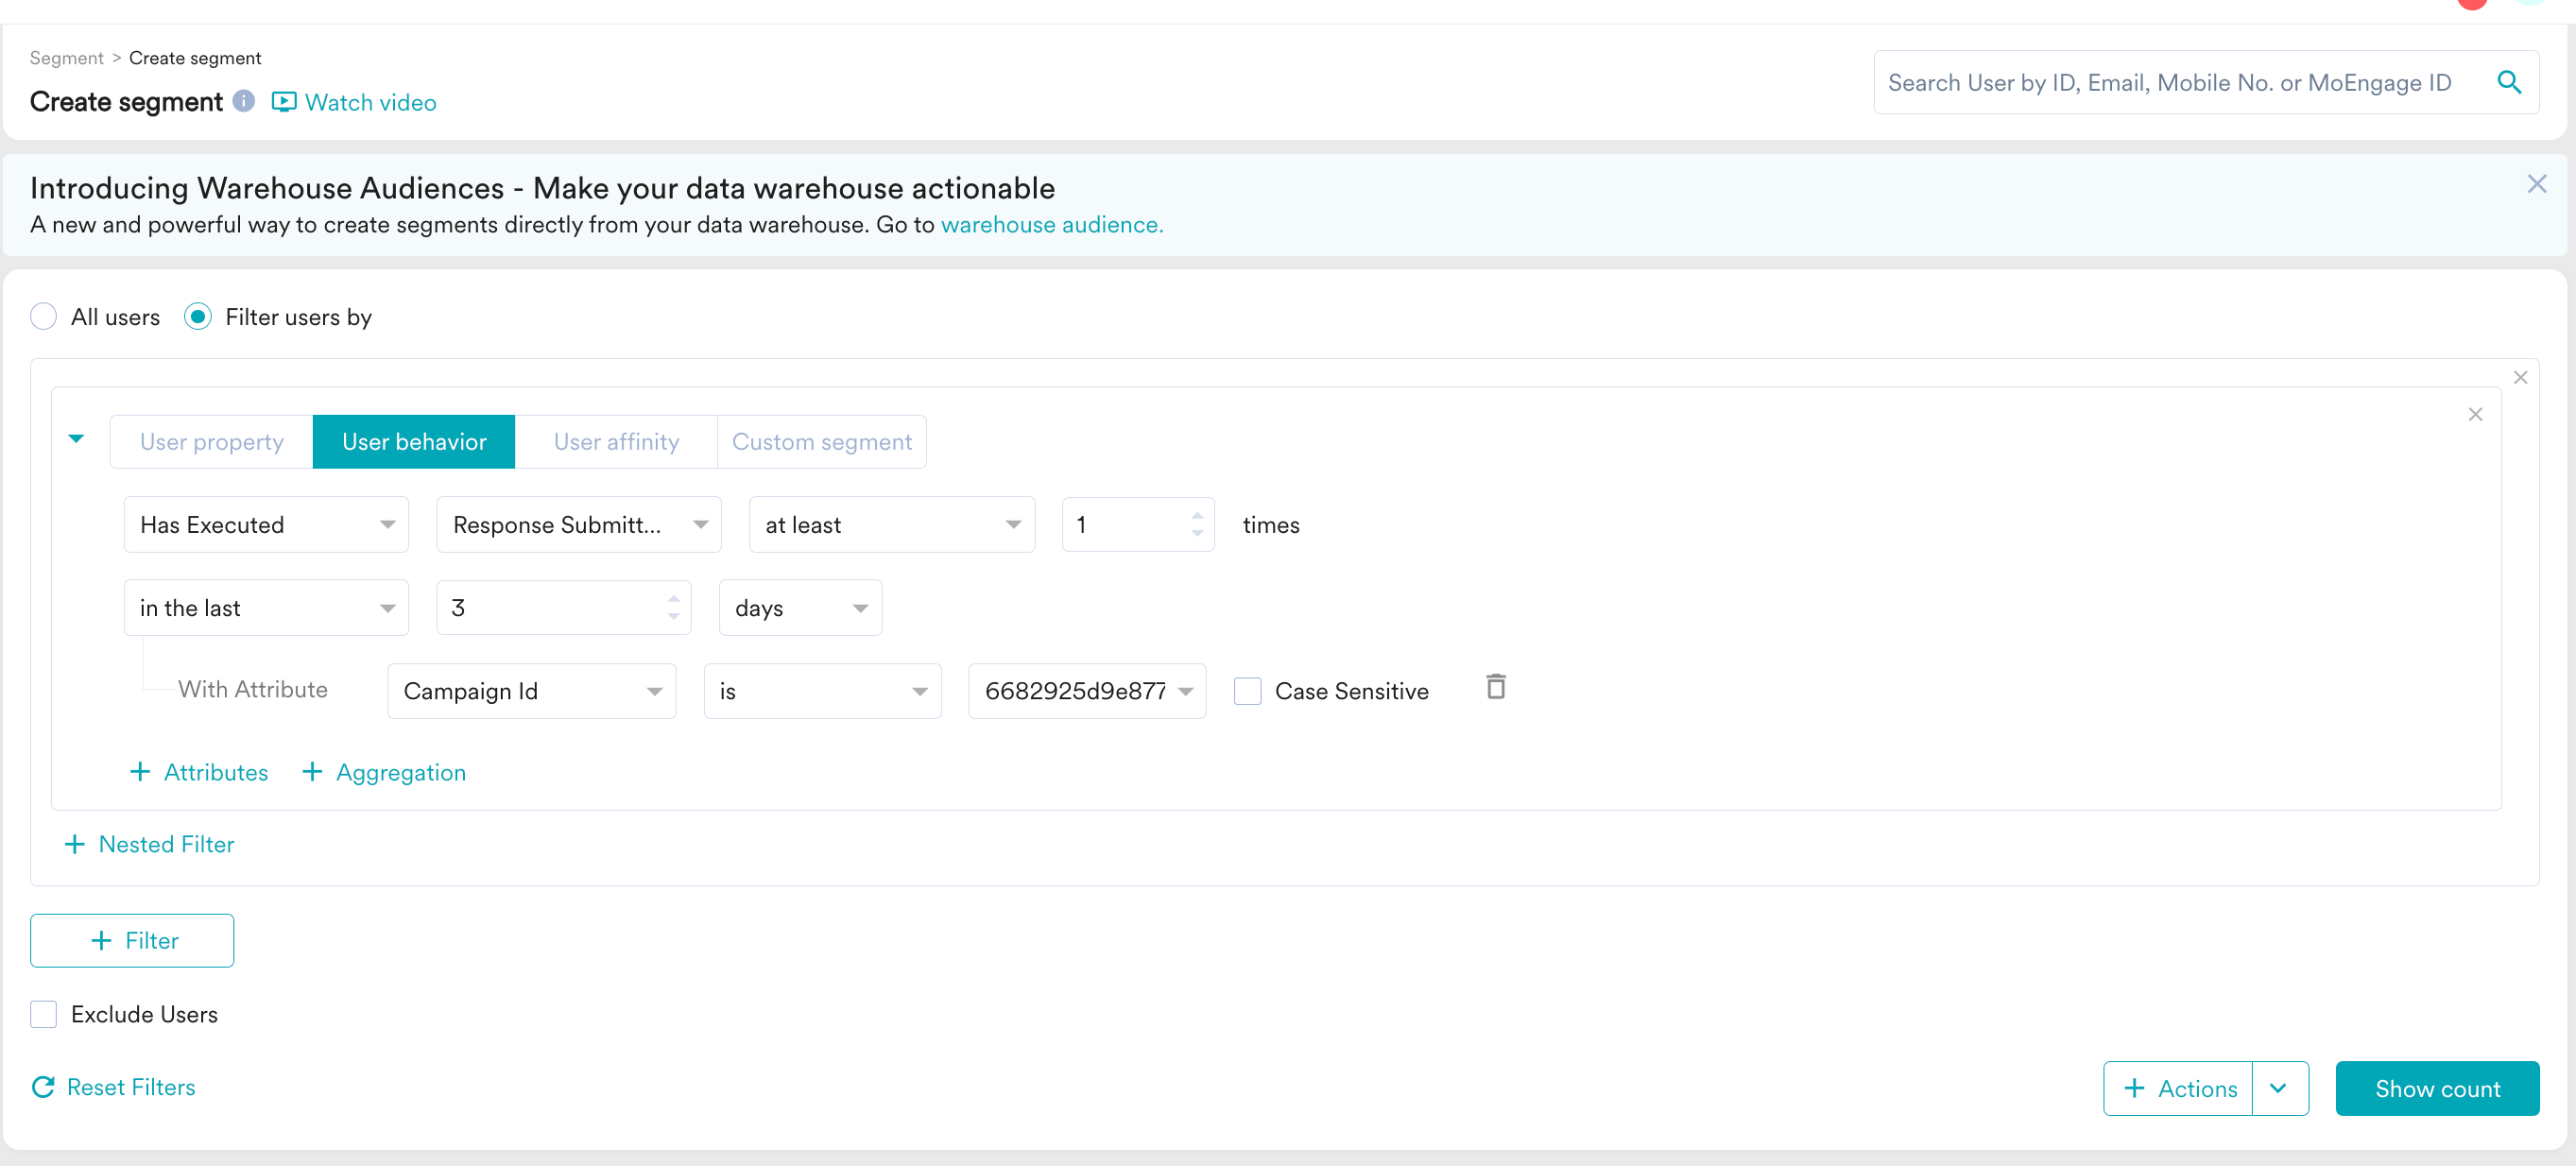
1. To view the collected survey responses and users who submitted them, go to **Segment** > **Create segment**.
2. Filter based on the “response submitted” event as shown below:
 # Conclusion
In this use case, we created an in-app message designed to collect NPS ratings from product buyers. You can gather valuable customer feedback by implementing this NPS rating pop-up using HTML in-app messages.
This automated campaign will help you measure customer satisfaction and identify areas for improvement, ultimately leading to better customer experiences and increased loyalty.
Now that we have published the campaign, we can track our CTR and conversions (if defined) to understand how well our campaign is performing. For more information, refer to [In-App Campaign Analytics](/user-guide/campaigns-and-channels/in-app-message/analyze/analyze-in-app-campaigns).
# Conclusion
In this use case, we created an in-app message designed to collect NPS ratings from product buyers. You can gather valuable customer feedback by implementing this NPS rating pop-up using HTML in-app messages.
This automated campaign will help you measure customer satisfaction and identify areas for improvement, ultimately leading to better customer experiences and increased loyalty.
Now that we have published the campaign, we can track our CTR and conversions (if defined) to understand how well our campaign is performing. For more information, refer to [In-App Campaign Analytics](/user-guide/campaigns-and-channels/in-app-message/analyze/analyze-in-app-campaigns).